Getting Started with the Nice Watermark Plugin
Installation
The installation is basically a two step process. No worries though there is not much to it, but it is good that you are reading this.... Kudos to you.
1. Install the plugin like you would any Joomla! Plugin using the extension manager.
2. Here is the extra step. You will need to set up a cache folder for Nice Watermark. No worries, it sounds harder than it really is. By default Nice Watermark is set to cache in your-joomla-installation/images/nicewatermark. Simply create a new folder in your Joomla! images folder called “nicewatermark”. Make sure to set the permissions for this new folder so that the plugin can write to it.
3. Enable the plugin. Done!
Image Cache Overview
Image manipulation can be CPU intensive, which can result in slower server response rates. By default the Nice Watermark plugin caches or saves all watermarked images for retrieval during consecutive page visits. The cached images are held in a specified folder (the default is images/nicewatermark) for a specified period of time. Once the expiry time has been reached for a specific article, any visit to it will result in all images for the particular article to be deleted and rebuilt or re-watermarked and cached again. At that point, the countdown to expiry starts over again.
The Nice Watermark cache expiry time is set in seconds in the Plugin Manager. For example, to obtain a cache expiry time of 1 hour you would enter “3600”. This means that any visits to an article, after one hour from the creation of the oldest watermarked image for the article, will trigger the deletion and rebuilding or re-watermarking of all watermarked images for the article.

During development it may be advantageous to set the cache expiry time to 0. This will cause an article's images to be watermarked every time the article page is refreshed or visited. This is convenient during development. You will be able see your tag changes instantly. However, it is important to change the cache expiry time back to a reasonable duration after development. This should be done in order to avoid slowing your server response time by slamming your server's CPU with image manipulation requests. This is especially true on servers with heavy traffic.
Please note that any new watermark image tags that are added to an article will be processed the first time the article is visited regardless of the cache expiry time settings.
Image Class Based Watermarking
Image class based watermarking is perhaps the simplest method to use. All that you need to do is add your image class names to the plugin parameter labeled "Class Based Watermarking" and click save (extensions>>Plugin Manager>>System - Nice Watermark). Make sure to separate multiple classes with commas.
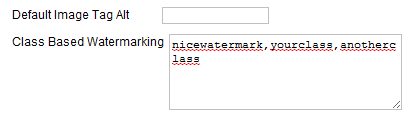
After you have updated the parameter, the Nice Watermarks will automatically watermark all images that use the specified class names.
Example Image tag using specified class:
<img class="yourclass" src="/images/imagetomark.jpg" />
Basic Tag Usage
You basically only need to provide an image and some text in the tag and Nice Watermark will handle the rest using it's default settings.
{nicewatermark:image url|watermark text}
Example
{nicewatermark:images/yourphoto.jpg|Your Watermark Text}
Pretty easy, eh? You can modify your default settings in the plugin parameters panel. Go to Admin>>Extensions>>Plugin Manager>>Content – Nice Watermark.

Extended Tag Usage
Overview
For more advanced options you will need to set other parameters in the tag. Let's take a look at the tag in its entirety.
{nicewatermark:image url|watermark text|color|alpha|font face|font size|font angle|vpos|hpos|class|style|title|alt}
The first 9 parameters control the various aspects of the watermark.
{nicewatermark:image url|watermark text|color|alpha|font face|font size|font angle|vpos|hpos|class|style|title|alt}
The last 4 parameters affect the automatically generated <img> tag.
{nicewatermark:image url|watermark text|color|alpha|font face|font size|font angle|vpos|hpos|class|style|title|alt}
Leaving any parameter, other than image url, blank will result in the Nice Watermark plugin utilizing your default settings for the blank parameter. To leave a paramter blank use a double pipe “||”.
Example
{nicewatermark:image url|watermark text||alpha|font face|font size|font angle|vpos|hpos|class|style|title|alt}
In the above example the default for color that is set in Admin>>Extensions>>Plugin Manager>>Content – Nice Watermark, will be used.
Optionally, you will get the same default effect if you truncate the tag for any parameters that are not included.
Example
{nicewatermark:image url|watermark text|color}
In the above example the default settings for alpha, font face, font size, font angle, vpos, hpos, class, style, title and alt will be used.
Tag Parameter Definitions
Image URL
{nicewatermark:image url|watermark text|color|alpha|font face|font size|font angle|vpos|hpos|class|style|title|alt}
This image URL parameter is self explanatory. In the image URL field you need to enter a relative path to the image that you wish to watermark.
Valid image formats include PNG, JPG and GIF. Please note, PNG and GIF transparencies will be preserved during the watermarking process.
Watermark Text
{nicewatermark:image url|watermark text|color|alpha|font face|font size|font angle|vpos|hpos|class|style|title|alt}
Enter the text that you want to use as the watermark.
Color
{nicewatermark:image url|watermark text|color|alpha|font face|font size|font angle|vpos|hpos|class|style|title|alt}
The color parameter controls the font color of the watermark text. Enter any valid hexidecimal value. For example #ffffff would result in white text. The “#” symbol is optional. Entering either #ffffff or ffffff would have the same results, white text.
Examples
{nicewatermark:images/clockwerx.jpg|white hex = #ffffff|#ffffff|100|roundbold|18|0|bottom:10|center:0}

Other Examples


Alpha
{nicewatermark:image url|watermark text|color|alpha|font face|font size|font angle|vpos|hpos|class|style|title|alt}
The alpha parameter sets the transparency level of the watermark text. Valid values range from 0 to 100. Entering a value of 100 will result in a solid color fill of the text with no transparency. Entering a value of 0 will result in a color fill that is completely transparent.
Example
{nicewatermark:images/clockwerx.png|alpha 85|ffffff|85|roundbold|40|0|bottom:10|center:0}

Other Examples


Font Face
{nicewatermark:image url|watermark text|color|alpha|font face|font size|font angle|vpos|hpos|class|style|title|alt}
There are 4 different font faces to choose from. Each font face has 4 font styles. In total there are 16 different font face style combinations available. To specify a valid entry for the font face parameter you need to enter the font face and the style as one word. For example, want a Sans Bold you would enter sansbold.
Example
{nicewatermark:images/cheddar.jpg|Font = "sansbold"|#ffffff|75|sansbold|18|0|bottom:10|center:0}

Valid parameter options
- sans
- sansitalic
- sansbold
- sansbolditalic
- serif
- serifitalic
- serifbold
- serifbolditalic
- round
- rounditalic
- roundbold
- roundbolditalic
- micro
- microbold
- microcondensed
- microcondensedbold


Please note, the micro font set look best at a font size of 6px.
Font Size
{nicewatermark:image url|watermark text|color|alpha|font face|font size|font angle|vpos|hpos|class|style|title|alt}
Specify your desired font size in pixels for the watermark text.
Font Angle
{nicewatermark:image url|watermark text|color|alpha|font face|font size|font angle|vpos|hpos|class|style|title|alt}
Enter the angle value in degrees for the watermark text. Valid values range from 0 to 360. Entering a value of 0 will result in no angle being applied to the text. Entering a value of 45 will result in the watermark text being applied at a 45 degree angle diagonally across the image.
Example
{nicewatermark:images/cheddar.jpg|Font = "sansbold"|#ffffff|75|sansbold|18|45|center:0|center:0}

Vpos
{nicewatermark:image url|watermark text|color|alpha|font face|font size|font angle|vpos|hpos|class|style|title|alt}
Vpos controls the vertical positioning of the text. This value is specified in two parts, position:padding. The “position” sets the text's initial vertical placement relative to the image's borders. Valid entries are top, center and bottom. The “padding” is a numerical value which specifies a padding amount in pixels that adjusts the text placement relative to its vertical position. Negative numbers are allowed. A valid entry for vpos should look something like this “top:15”. This specifies that the watermark text is to be aligned to the top of the image with a padding of 15px. To vertically center the watermark in an image use “center:0”
Hpos
{nicewatermark:image url|watermark text|color|alpha|font face|font size|font angle|vpos|hpos|class|style|title|alt}
Hpos controls the horizontal positioning of the text. This value is specified in two parts, “position:padding”. The “position” sets the text's initial horizontal placement relative to the image's borders. Valid entries are left, center and right. The “padding” is a numerical value which specifies a padding amount in pixels that adjusts the text placement relative to its horizontal position. Negative numbers are allowed. A valid entry for hpos should look something like this “left:15”. This specifies that the watermark text is to be left justified with a padding of 15px. To horizontally center the watermark in an image use “center:0”
Class
{nicewatermark:image url|watermark text|color|alpha|font face|font size|font angle|vpos|hpos|class|style|title|alt}
The class parameter specifies any css class attribute that is to be applied to the automatically generated HTML image tag. The HTML image tag replaces the Nice Watermark tag in the public facing article page. Specifying a CSS class heightens control over the final watermarked image display.
Example
...font angle|vpos|hpos|myimageclass|style|title|alt}
Results in the following image tag
<img class="myimageclass" src=”image.jpg” />
Style
{nicewatermark:image url|watermark text|color|alpha|font face|font size|font angle|vpos|hpos|class|style|title|alt}
The style parameter is very similar to the class parameter. The style parameter allows the specification of in-line image tag style attribute. The HTML image tag replaces the Nice Watermark tag in the public facing article page. Specifying a style attribute heightens control over the final watermarked image display.
Example
...font angle|vpos|hpos|class|margin-left: 50px;|title|alt}
Results in the following image tag
<img style="margin-left: 50px;" src=”image.jpg” />
Title
{nicewatermark:image url|watermark text|color|alpha|font face|font size|font angle|vpos|hpos|class|style|title|alt}
The title parameter specifies the value for the image tag title attribute.
Example
...font angle|vpos|hpos|class|style|My Image Title|alt}
Results in the following image tag
<img src=”image.jpg” title=”My Image Title” />
Alt
{nicewatermark:image url|watermark text|color|alpha|font face|font size|font angle|vpos|hpos|class|style|title|alt}
The title parameter specifies the value for the image tag alt attribute.
Example
...font angle|vpos|hpos|class|style|title|Photo of cartwheeling clowns.}
Results in the following image tag
<img src=”image.jpg” alt=”Photo of cartwheeling clowns.” />